Setting up your domain email with Google Apps
While Google’s Mail Fetcher function lets you import your domain email account into your Gmail account, Google Apps lets you host your domain email with Google without tying you to a Gmail.com email address.
In this article, we will show you how to setup Google Apps for your domain email.
Getting started
Pre-checklist:
![]() access to your domain DNS zone files (in your Doteasy Member Zone)
access to your domain DNS zone files (in your Doteasy Member Zone)
Note: that in order to set up your domain emails with Google Apps, you need to be comfortable editing your domain DNS records as you will need to make MX record changes to your DNS records to point your mail service to Google.
What is Google Apps? What is the difference between importing email account into Gmail and setting up domain email with Google Apps?
While Google lets you import your existing domain email account into Gmail, in order to do so, you will need to already have created a domain email account and you will need to have signed up for a Gmail account. Emails sent to your domain email address will still first arrive at your Doteasy mail server. When you login to your Gmail account, Google will connect to your Doteasy mail server to download all your domain email messages. In other words, you are using Gmail as an email client.
On the other hand, when you set up your domain email with Google Apps, you are not required to have an existing Gmail account – all you need is a Google Apps account. With Google Apps, you are moving your entire email infrastructure to Google. You will setup your email accounts with Google and your domain email services will be hosted by Google.
Setting up domain email with Google Apps
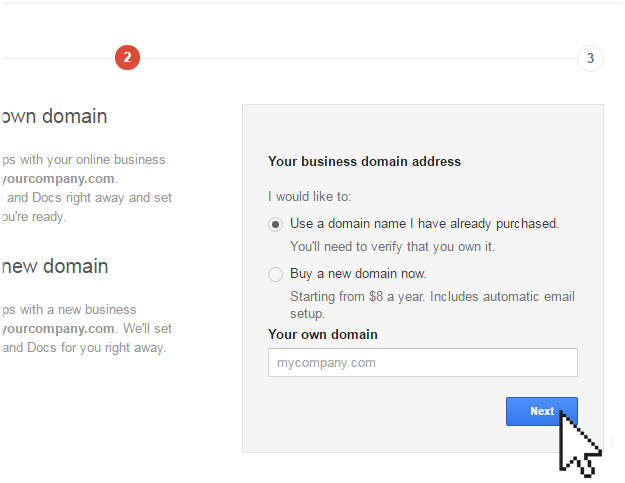
- When signing up for a Google Apps account, make sure you specify you are using your existing domain name.

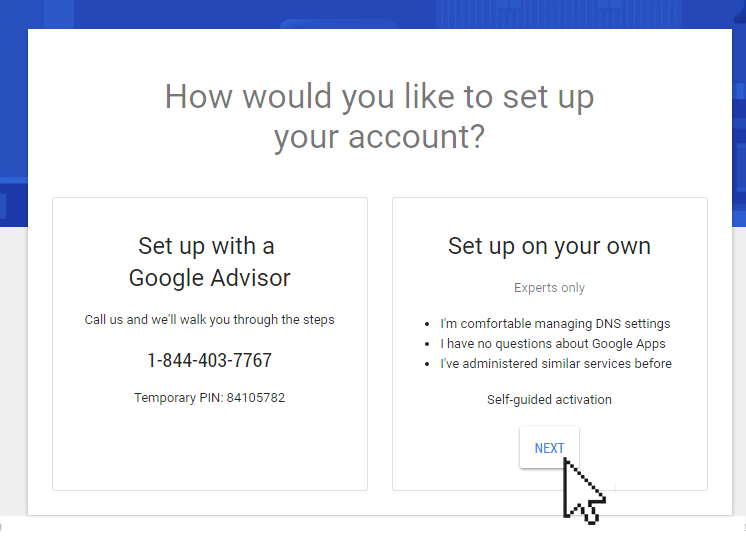
- Once you have registered a Google Apps account, you will be redirected to the setup wizard. Select the Set up on your own option.
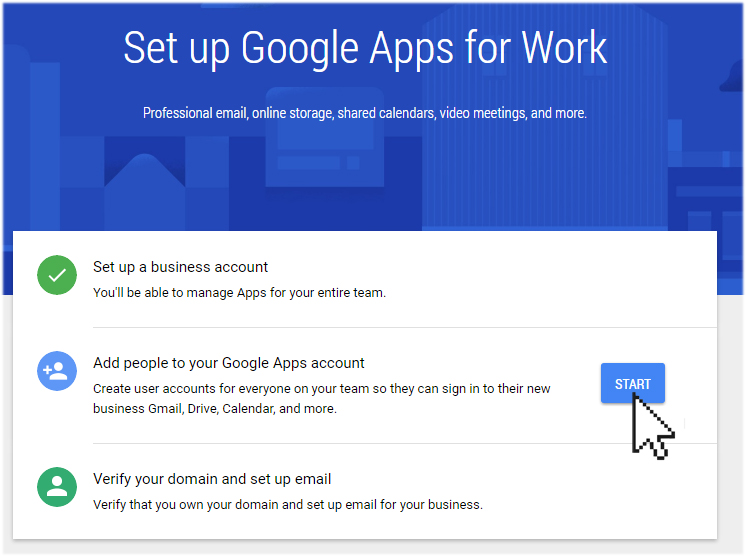
- The next step is about creating user accounts on your Google Apps account. You can create up to 10 user accounts.
- Next, you will need to verify your domain ownership – you will not be able to use Google Apps until you have completed this step.

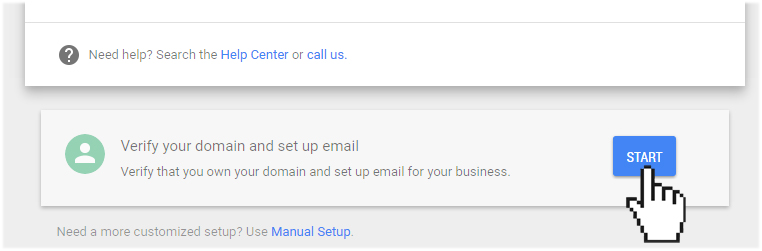
Verifying your domain ownership
Google offers a few options to verify your domain ownership.
HTML verification file
The first and easiest is to upload the HTML verification file. All you need is an FTP account or access to the File Manager in your account cPanel.
With this option, simply download the HTML verification file and upload it to the root of your domain via FTP or the cPanel File Manager tool. Once the file has been uploaded, all you need to do is confirm the upload at http://yourdomain.com/name_of_verification_file.html (replace yourdomain.com with your own domain name and replace name_of_verification_file.html with the actual name of the Google Verification File).
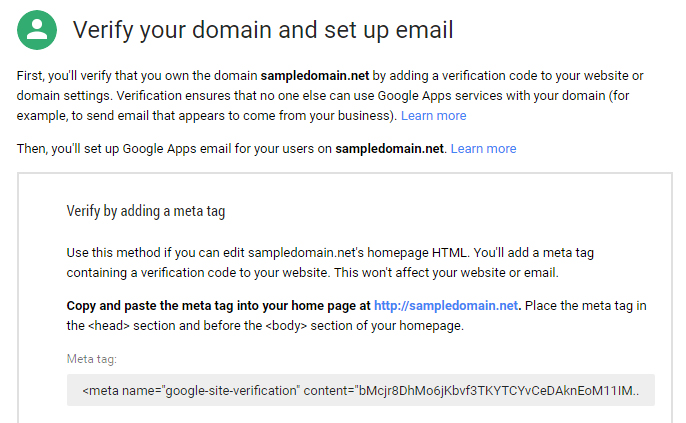
Meta tag
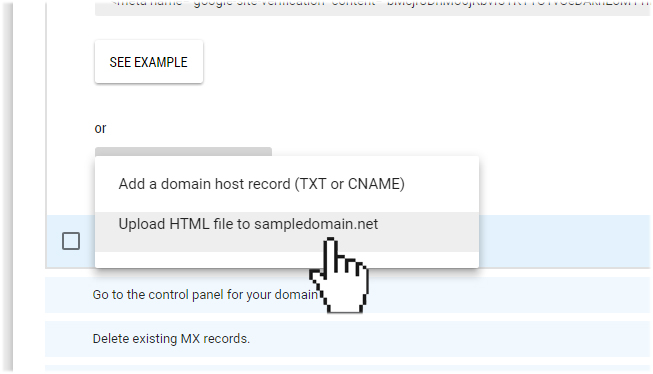
The second method is by adding a meta tag to your website. In order to use this method, you need access to your website’s homepage HTML. Simply copy and paste the provided meta tag into your home page, anywhere before </head> the tag.
DNS Records
The third method is to add a domain host record (TXT or CNAME).
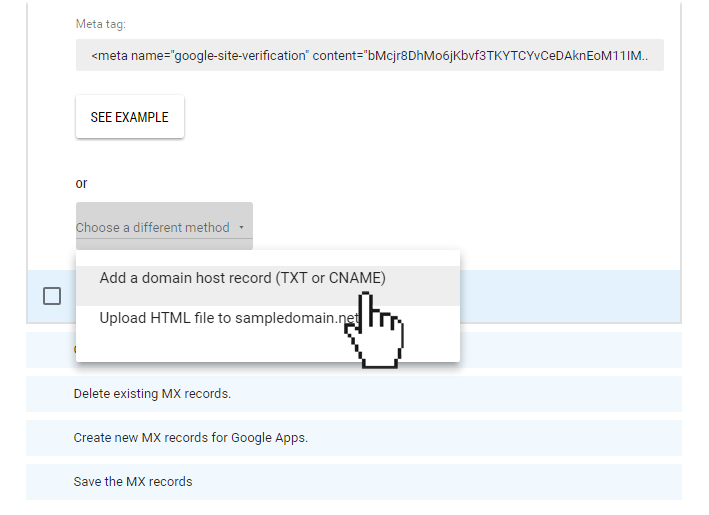
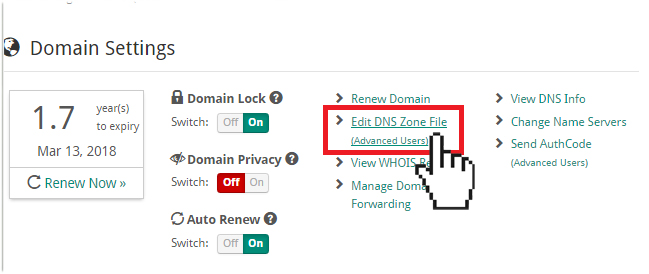
For this option, you will need to be comfortable adding the domain host record via the Edit Zone File tool in your Doteasy Member Zone.
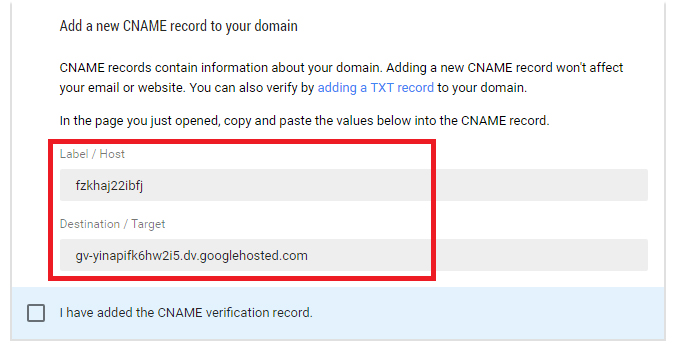
For example, say you are verify your domain ownership using the CNAME method, you will open the Edit DNS Zone File tool in your Doteasy Member Zone.
Next, you will add the CNAME record specified by Google:

Once you have verified your domain ownership, you will need to remove your existing MX records and create new ones for Google Apps.
Create new MX records for Google Apps
For this step, you will need to be comfortable with editing your MX records in your Domain DNS panel.
An MX record tells senders how to send email for your domain. Each MX record points to a mail server that is configured to process mail for that domain. In other words, in order for you to send and receive emails at your domain email address, your domain’s MX records must point to the mail server that process your emails.
By default, when your domain is registered with Doteasy, your MX record points to your Doteasy mail server. When you setup Google Apps for your domain emails, you need to edit your MX records so that it points to the Google mail server.
MX record changes are made in the Edit DNS Zone File tool in your Doteasy Member Zone.
As per the Google instructions, you need to delete any existing MX records for your domain name.
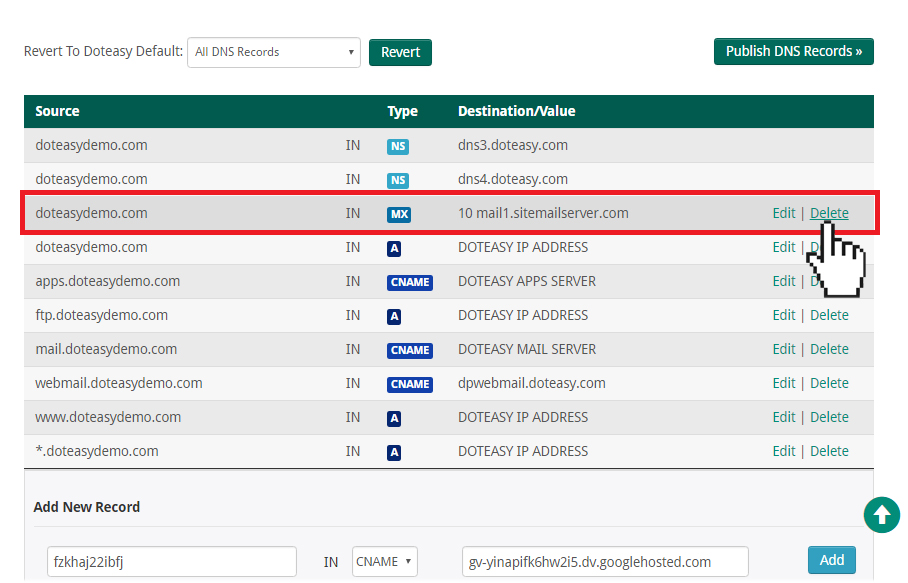
Next, you will need to create a new MX record for your domain name.
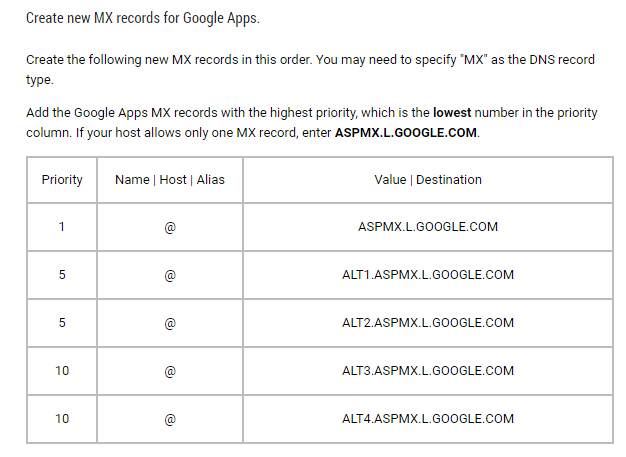
You will enter the MX records into your Doteasy Member Zone like this:

*NOTE: remember to click on the Publish DNS Records to complete the process.
MX record changes typically take 24 to 28 hours to take effect. In other words, once you have completed the MX record changes, you will still need to login to your Doteasy domain email account to access your emails.
If the verification process is successful, you will get a confirmation message from Google and you can proceed to setup your email accounts on the Google mail server as per further instructions from Google’s setup wizard.
