Accessing your domain emails in Windows Live Mail
Windows Live Mail is a free desktop email program Microsoft introduced to replace Outlook Express. It is part of the Windows Essentials suite.
In this article, we will show you how to add your domain email account to your Windows Live Mail application.
Getting started
Pre-checklist:
![]() Create your domain email address
Create your domain email address
![]() Obtain your email client configuration settings from View Email Client Info in your Doteasy Member Zone
Obtain your email client configuration settings from View Email Client Info in your Doteasy Member Zone
![]() Download and install Windows Live Mail on your computer
Download and install Windows Live Mail on your computer
Your email client configuration settings
In order to successfully setup your domain email accounts on your Windows Live Mail app, you will need to have the following information:
- Domain email address and password
- Incoming mail server and port information
- Outgoing mail server and port information
You can find all these information in your Doteasy Member Zone, under View Email Client Info.

For more information on your email client configuration info, please refer to our article Your Email Client Configuration Info.
Adding your domain email account to your Windows Live Mail application
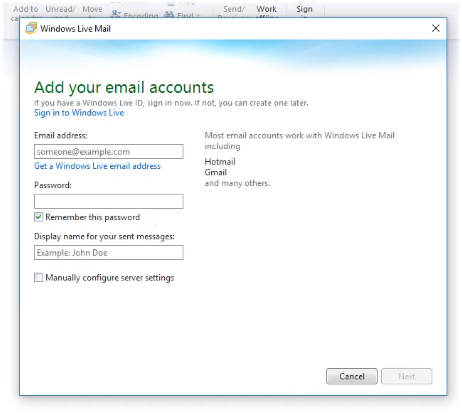
- Open Windows Live Mail on your computer. If this the first time you’ve set up your Windows Live Mail, you will be prompted to create an email account.

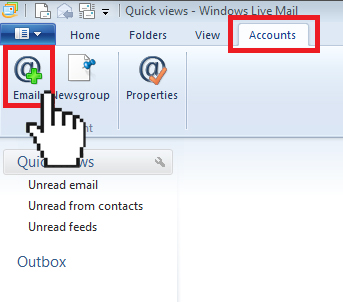
If you have already set up your Windows Live Mail app, then simply click on the Accounts tab and select the add Email icon.
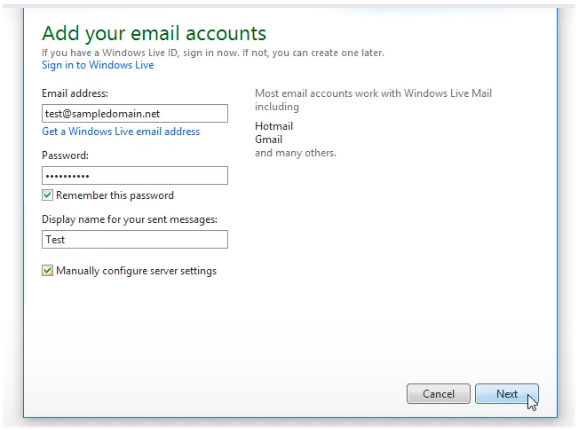
- Enter your domain email account information into the Add your email accounts window: your email address, password and your display name. Check the Manually configure server settings and click Next to proceed to the next step.
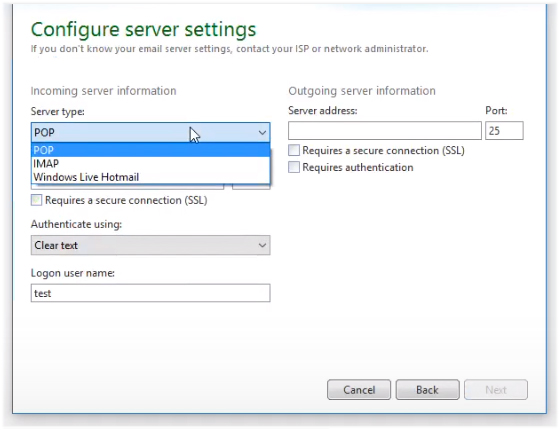
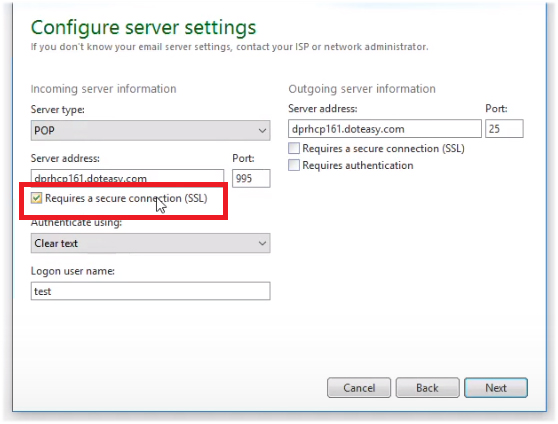
- On the Configure server settings window, select the desired incoming server type: POP or IMAP. If you are not sure which one to pick, you can refer to our article POP3 and IMAP
- Enter the incoming server information as per the settings provided in the View Email Client Info panel in your Doteasy Member Zone. If you are using the Secure-SSL/TLS settings, make sure you check the Requires a secure connection (SSL) checkbox.
If you are using the Non-SSL settings, simply uncheck the box.
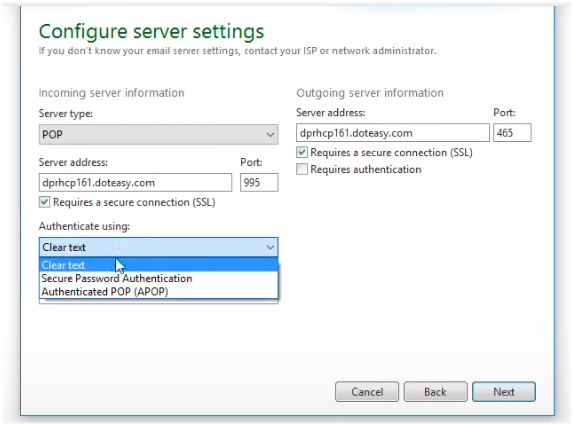
- Under the Authenticate using: drop-down menu, select Clear text.
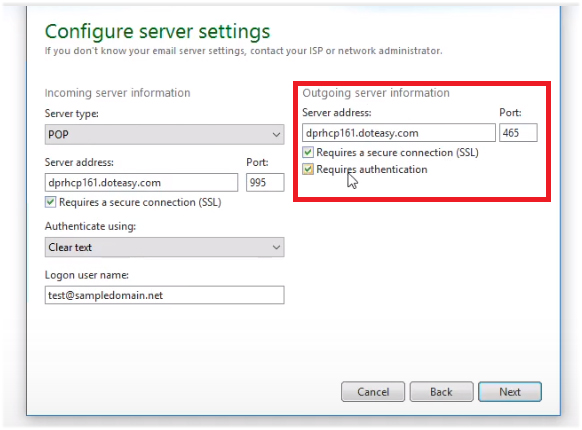
- Enter the outgoing server information as per the settings provided in the View Email Client Info panel in your Doteasy Member Zone.
Again, if you are using the Secure SSL/TLS settings, make sure you check the Requires a secure connection (SSL) box and your port number is set to 465.
If you are using the Non-SSL settings, simply uncheck the box and set the port number to 587.
Check the Requires authentication box, regardless of which setting you are using.
- Enter your logon user name, which is simply your full email address.
- When you are ready, click Next.
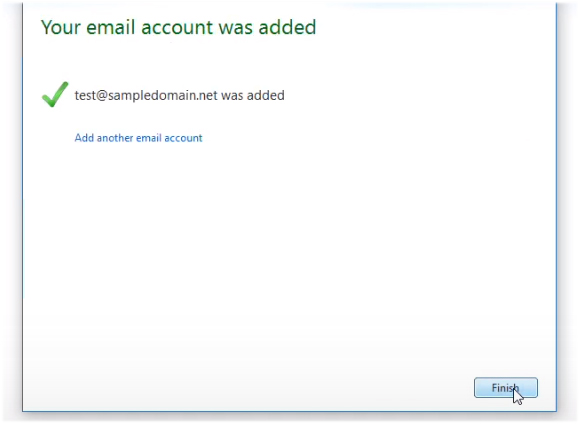
- On the Your email account was added confirmation window, click Finish to complete the setup process.
Your Windows Live Mail app is now configured to access your Doteasy domain email account. If you want to use Windows Live Mail to access another domain email account, simply click Add another email account and follow the Steps 2 to 9 to add the new domain email account.
This completes the Windows Live Mail configuration process. If you have any questions about this article or our video tutorial, or if you should run into any problems, please do not hesitate to contact us. You can reach us by email, phone and live chat. We also offer a call back service.
