Customizing Your Domain Email Account Auto-Responder Options
An email auto-responder lets you set up automated replies to incoming emails. This feature is great to use when notifying customers you have received their email. It is also helpful when you are out of the office (ie. on vacation) and you can let people who contact you know you are unavailable at the moment.
All domain email accounts you create with Doteasy come with auto-responder. You can customize the auto-responder settings from both your Doteasy admin panel and from the individual email account’s webmail dashboard.
Adding an email auto-responder from Doteasy admin panel
If you are the administrator of the web hosting account, you can customize the email auto-responder settings from your Doteasy account admin panel.
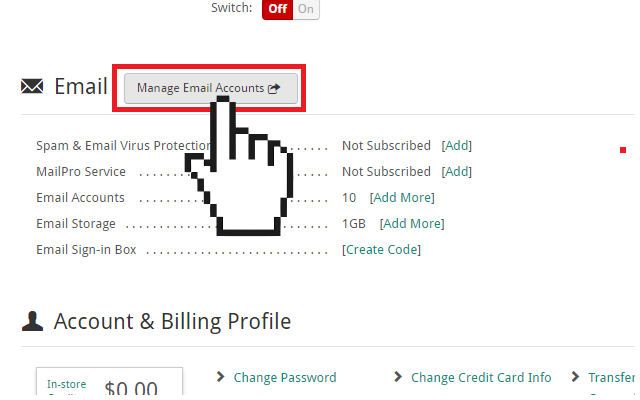
- Log into your Doteasy Member Zone
- In the Email section, click on Manage Email Accounts.

If you are on the cPanel mail platform:
You will be redirected to your account cPanel dashboard.
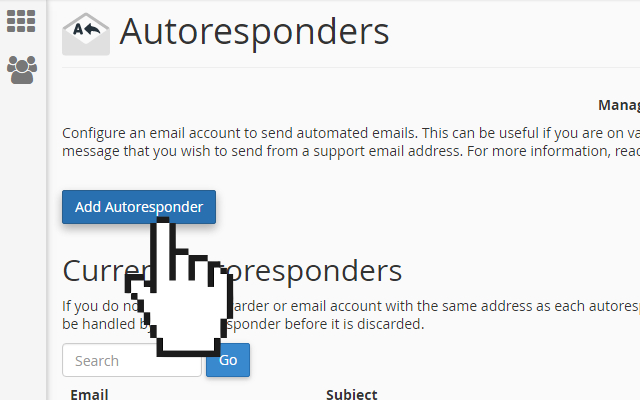
- In the Email section, click on Autoresponders.
- On the Autoresponders page, click Add Autoresponder to create an email auto-responder.
- Fill in the fields to create your auto-responder.
Option Description Character set Select a character set for the email. UTF-8 is the most commonly used and recommended. Interval Here you can specify the number of hours you want for the auto-responder to wait to reply with a second auto-responder to the same sender. Email Select the email address you are setting up the auto-responder for. From You can enter a “From” address here. Subject Enter a subject line here. For example, “We have receive your email” or “We are out of the office.” HTML Check this if the body of the email will contain HTML. If you leave it unchecked, HTML tags will show up as plain text in the auto-response. Body Enter your auto-responder message here. Start Choose if you want this auto-responder to begin Immediately or set a Custom start time. Stop Here you can set a Custom date for your auto-responder to stop responding, or set to Never. - When ready, click Create/Modify to complete the process.
If you are on the SmarterMail platform:
Unfortunately, you will not be able to create auto-responders for your domain user accounts from your SmarterMail admin account. To create an auto-responder for an email address, you will need to do so through that email address’ webmail interface.
Customizing email forwarding settings from the webmail dashboard
Email forwarding settings can also be customized from the email account’s webmail dashboard.
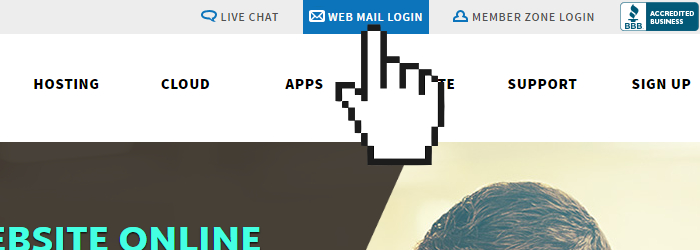
- Go to the Doteasy homepage and click on Web Mail Login.
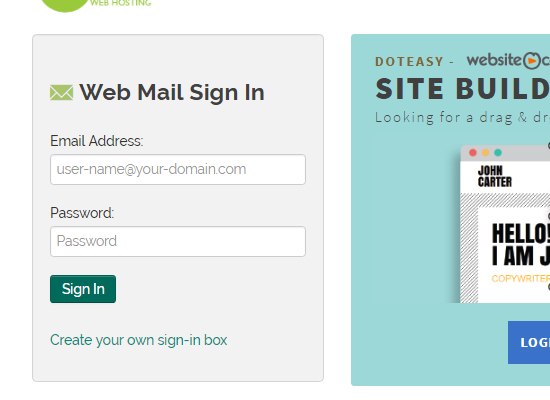
- Log into webmail using the email address and password of the account you want to edit email auto-responder settings.
If you are on the cPanel mail platform:
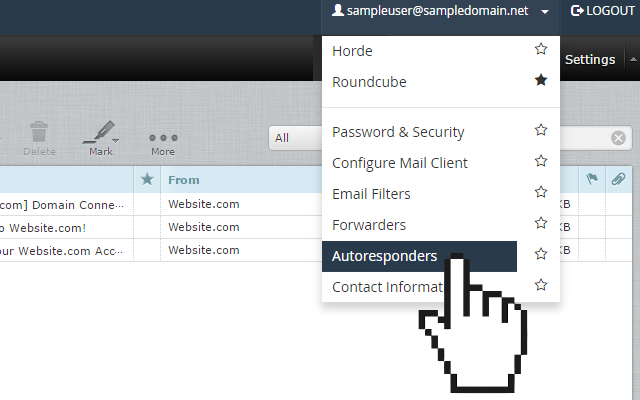
You will be logged into your preferred webmail application (RoundCube or Horde).
- Click on the top username drop-down menu and select Autoresponders.
- On the Autoresponders page, click Add Autoresponder to create an email auto-responder.
- Fill in the fields to create your auto-responder.
Option Description Character set Select a character set for the email. UTF-8 is the most commonly used and recommended. Interval Here you can specify the number of hours you want for the auto-responder to wait to reply with a second auto-responder to the same sender. Email Select the email address you are setting up the auto-responder for. From You can enter a “From” address here. Subject Enter a subject line here. For example, “We have received your email” or “We are out of the office.” HTML Check this if the body of the email will contain HTML. If you leave it unchecked, HTML tags will show up as plain text in the auto-response. Body Enter your auto-responder message here. Start Choose if you want this auto-responder to begin Immediately or set a Custom start time. Stop Here you can set a Custom date for your auto-responder to stop responding, or set to Never. - When ready, click Create/Modify to complete the process.
If you are on the SmarterMail platform:
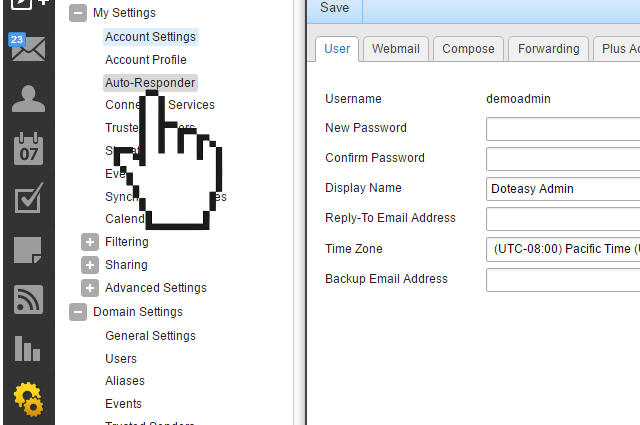
You will be logged into your SmarterMail webmail dashboard.
- Click on Settings on the side menu and under My Settings, select Auto-Responder.
- Click on the Options tab and check the Enable auto-responder option.
- Click on the Message tab and fill in the fields to create your auto-responder.
Option Description Subject Enter a subject line here. For example, “We have received your email” or “We are out of the office.” Compose Format Use the drop-down menu to select the desired compose format: HTML or Text. Start Select the desired start date for auto-responder to begin. End Select the desired end date for auto-responder to stop. Body Enter your auto-responder message here. - When ready, click Save to complete the process.
- Click on the top username drop-down menu and select Autoresponders.