Customizing Your Domain Email Account Mailbox Storage Quota
Doteasy gives your maximum flexibility and control when it comes to your domain email accounts. Customization options include mailbox storage quota, email filters and rules, auto-responders, email forwarding and more.
In this article, we will show you how to customize the mailbox storage quota of your domain email account.
Combined domain inbox storage quota
Each web hosting account comes with a combined domain mailbox storage quota. This is the total storage quota for all the email accounts under one domain name. The number of email accounts you can create under your domain name depends on the hosting plan you are on.
For example, the Starter Plan comes with a combined domain mailbox storage quota of 1GB and you are allowed to create up to 10 domain email accounts.
How you divide up the combined storage quota is up to you – Doteasy gives you total control over how the domain mailbox storage is allocated between your email inboxes. For example, you can create just one domain email account and allocate the combined storage quota to that one account. Or, you can create as many email accounts as you need (or as allowed by your hosting plan) and allocate the quota anyway you like.
Assigning an mailbox quota to a new domain email account
When you create your domain email account, you are given the option to assign an mailbox storage quota.
- Log into your Doteasy Member Zone
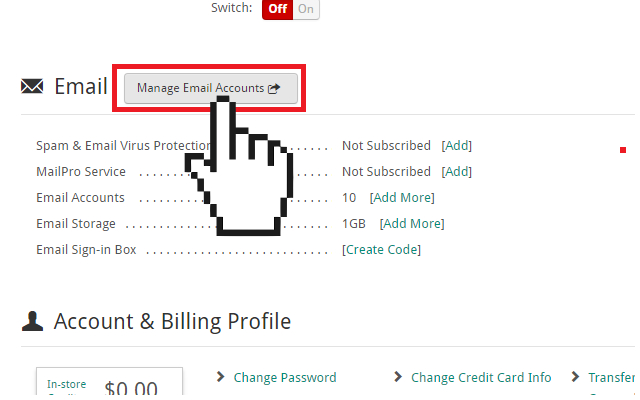
- In the Email section, click on Manage Email Accounts.

If you are on the cPanel mail platform:
You will be redirected to your account cPanel dashboard.
- In the Email section, click on Email Accounts.
- On the Add Email Account page, create the email account by entering the email address and password as instructed on the page.
- Under Mailbox Quota, select the desired mailbox storage quota. You can enter the desired quota (numeral value) or you can select the Unlimited option.
- When ready, click Create Account to complete the process.
If you are on the SmarterMail platform:
You will be redirected to your SmarterMail admin dashboard.
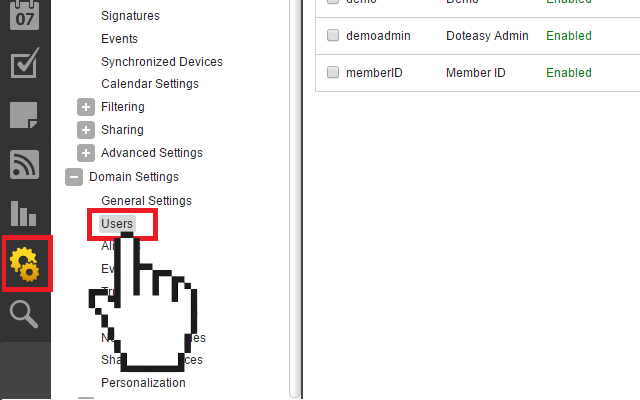
- Click on Settings on the side menu and then click Users.
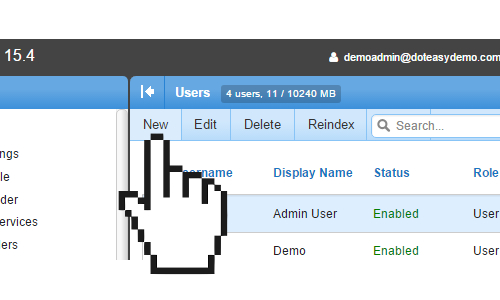
- Click New to add a new user.
- Under Mailbox Size Limit, enter the desired mailbox quota in numeral value.
- When ready, click Save to complete the process.

Editing an mailbox quota of an existing domain email account
You can also edit an email account’s mailbox quota anytime you need.
- Log into your Doteasy Member Zone
- In the Email section, click on Manage Email Accounts.
If you are on the cPanel mail platform:
You will be redirected to your account cPanel dashboard.
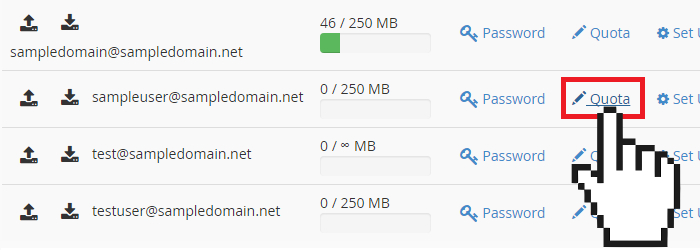
- In the Email section, click on Email Accounts.
- Scroll to find the email you want to edit and click Quota.
- Enter the new mailbox quota in the Mailbox Quota field.
- When ready, click Quota to save the changes.
If you are on the SmarterMail platform:
You will be redirected to your SmarterMail admin dashboard.
- Click on Settings on the side menu and then click Users.
- Select the user you want to edit by checking the box next to the username.
- Click Edit.
- Enter the new mailbox quota in the Mailbox Size Limit field.
- When ready, click Save to save the changes.