Accessing your emails with Outlook 2013 and Outlook 2016
If you have Outlook 2016 or Outlook 2013, you can set it up for your domain email account.
In this article we will show you how to set up Outlook 2016 to access your domain email accounts. The steps are very similar and the settings are essentially identically to that of Outlook 2013.
Note that this article is not about connecting your domain email account to an Outlook.com account. Outlook.com no longer support custom domain email account. If you have previously set up Outlook.com with your domain email address, you will still be able to send and receive emails. But all new domain email accounts will have to use Office 365. Office 365 is a paid service, starting at $5/month per user.
Getting started
Pre-checklist:
![]() Create your domain email address
Create your domain email address
![]() Obtain your email client configuration settings from Member Zone
Obtain your email client configuration settings from Member Zone
Your email client configuration info
In order to successfully setup your domain email accounts on your Outlook 2016, you will need to have the following information:
- Domain email address and password
- Incoming mail server and port information
- Outgoing mail server and port information
You can find all these information in your Doteasy Member Zone, under View Email Client Info.
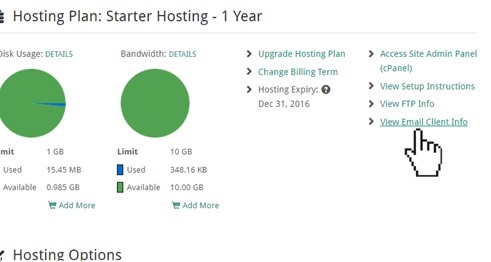
For more information on your email client configuration info, please refer to our article Your Email Client Configuration Info.
Adding your domain email account to your Outlook 2016
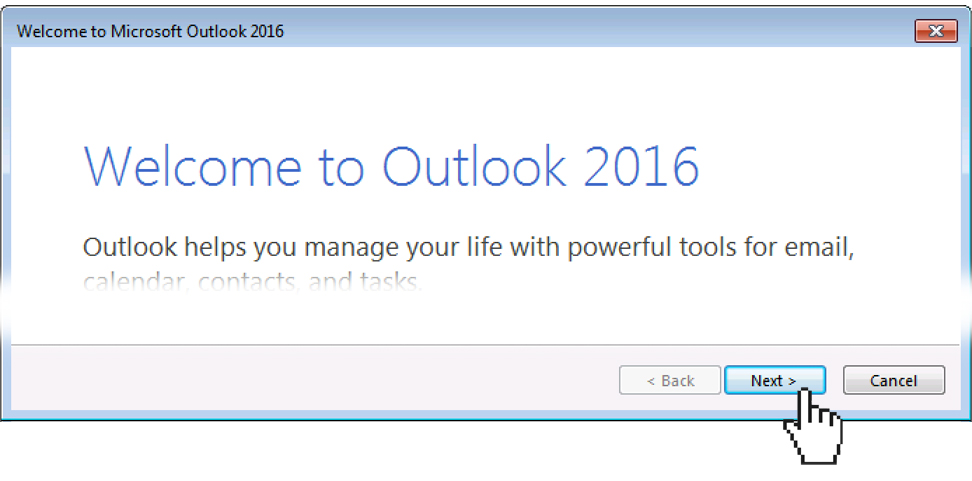
- Open Outlook 2016.
- If this is the first time you’ve set up your Outlook 2016, you will get a Welcome window prompting you to add an email account.

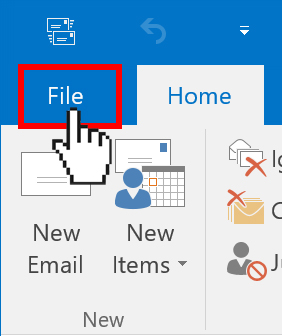
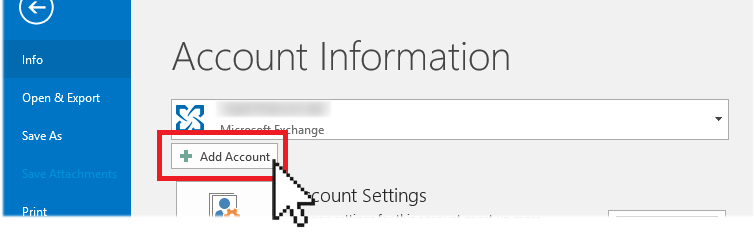
If you have previously set up your Outlook 2016, then click on File and select Add Account.
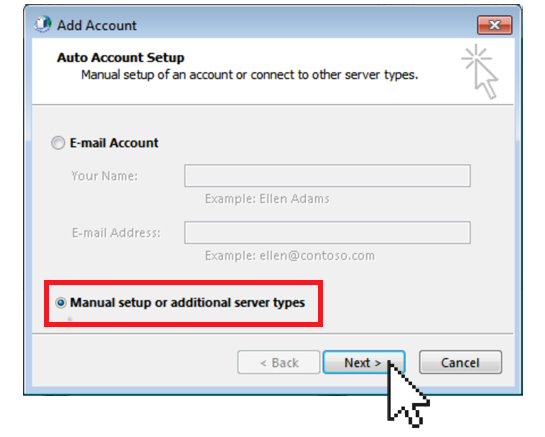
- On the Add Account window, select the Manual setup or additional server types option and click Next.
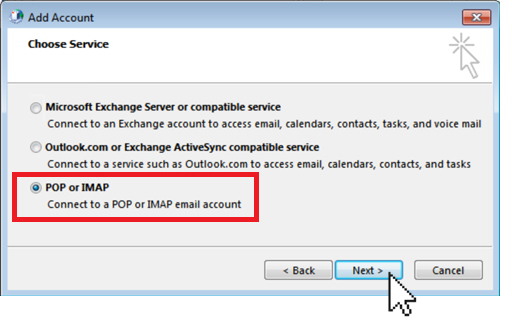
- Select POP or IMAP and click Next.
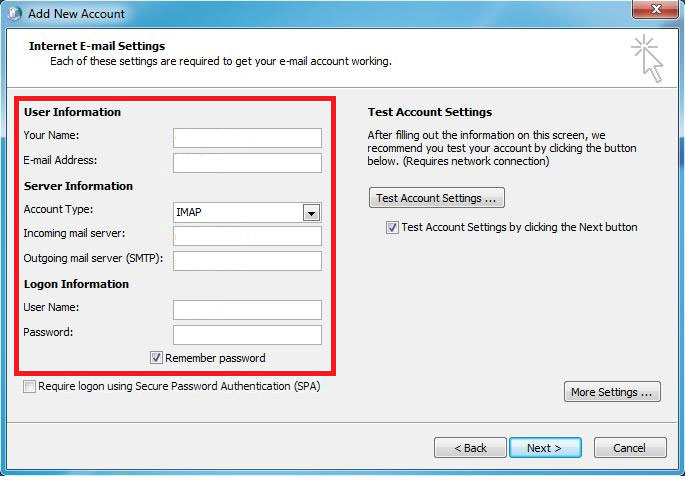
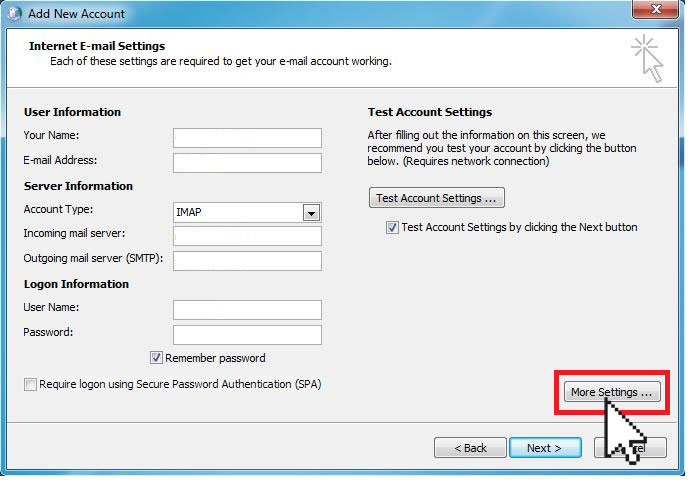
- On the POP and IMAP Account Settings window, enter your account information:
- Your name – this is the name your email recipients will see when you email them
- Email address – enter your full domain email address, for example, you@yourdomain.com
- Account type – choose POP3 or IMAP4. If you are not sure which one to pick, you can refer to our article POP3 and IMAP
- Incoming email server – you will need to enter the incoming mail server settings that is provided to you in your View Email Client Info panel in your Doteasy Member Zone
- Outgoing email server – again, you will need to enter the outgoing mail server settings that is provided to you in your View Email Client Info panel in your Doteasy Member Zone
- User name – enter your full domain email address
- Password – enter your domain email account password
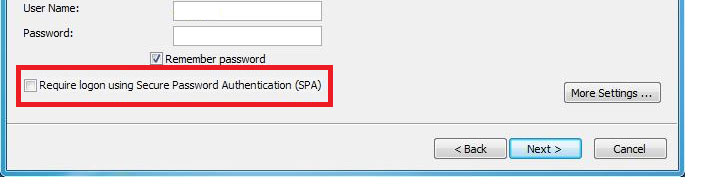
- Make sure the Require logon using Secure Password Authentication (SPA) box is unchecked.
- Click on More Settings. This will open the Internet E-mail Settings window.
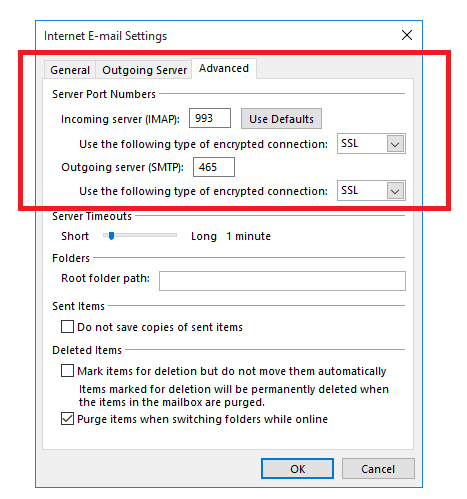
- Under the Outgoing Server tab, select the following options:
- My outgoing server (SMTP) requires authentication
- Use same settings as my incoming mail server
- Under the Advanced tab, check that the incoming and outgoing server port numbers match those listed on your View Email Client Info settings.
For Incoming server:
- 995 - if you are using the POP3 protocol with Secure-SSL
- 993 – if you are using the IMAP protocol with Secure-SSL
- 110 – if you are using the POP3 protocol with Non-SSL
- 143 – if you are using the IMAP protocol with Non-SSL
For Outgoing server:
- 465 - if you are using SMTP with Secure-SSL
- 587 – if you are using SMTP with Non-SSL
- When you are ready, click OK to close the Internet E-mail Settings window.
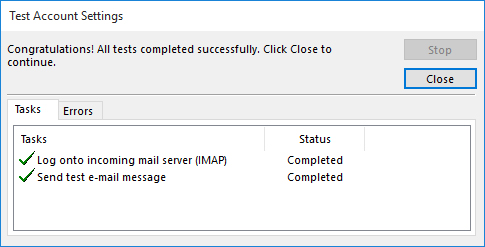
- Click Next on the Add New Account window. If you have entered all settings correctly, Outlook will let you know “all tests completed successfully”
- When ready, click Close.
This means your Outlook 2016 is now configured to access your Doteasy domain email account. If you want to use Outlook 2016 to access another domain email account, simply click on the File and select Add Account and follow Steps 3 to 10 to add a new domain email account to the Outlook 2016.

This completes the Outlook 2016 configuration process. If you have any questions about this article, or if you should run into any problems, please do not hesitate to contact us. You can reach us by email, phone and live chat. We also offer a call back service.
