Changing your domain's MX record
A MX record is a record in your domain’s DNS that specifies which mail server is responsible for your domain emails.
By default, when you sign up for a Doteasy web hosting account, your domain’s MX record will list a Doteasy mail server as the one handling your domain emails. This means all emails sent to your domain email addresses will be delivered to the Doteasy mail server and from there the emails will be delivered to your inbox on the Doteasy mail server.
If you need to use another email service provider, such as Google Apps or Microsoft Office 365, to handle your domain emails, then you will need to change your domain MX records so that your emails will be directed to your inbox on their mail servers.
In this article, we will show you where and how to make MX record changes.
How to view my current MX records?
If your domain name was registered through Doteasy, then your domain MX record can be accessed in your Doteasy Member Zone.
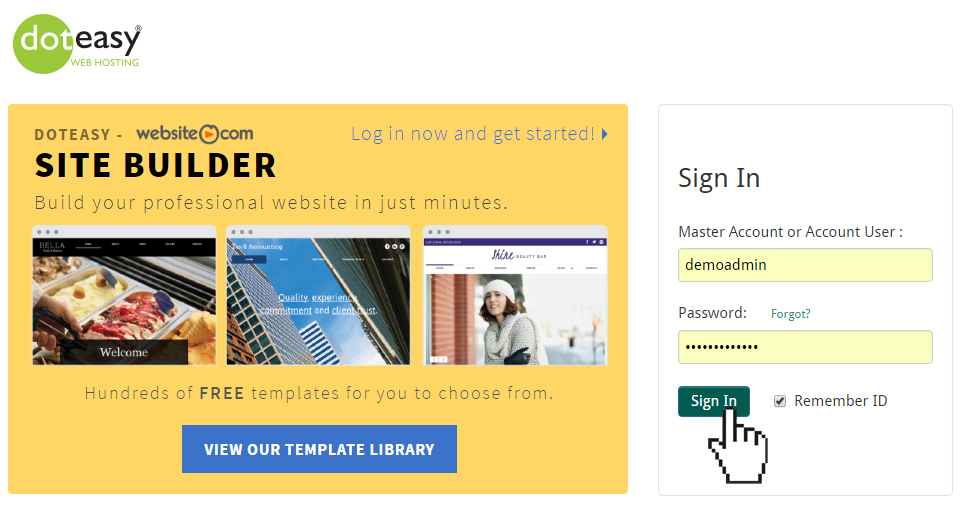
- Log into your Doteasy Member Zone

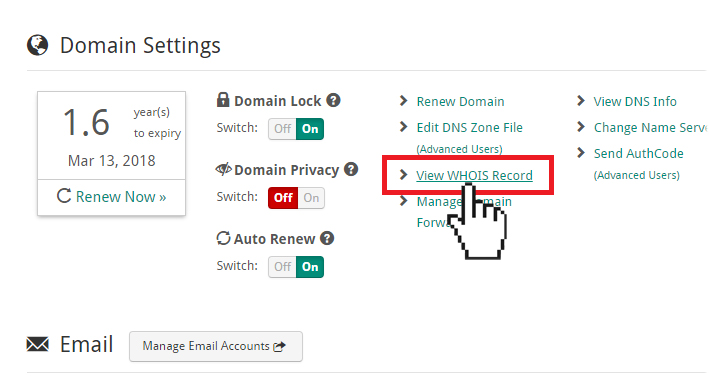
- Once you’re logged into your Member Zone, scroll down to the Domain Settings section. There, you will find the Edit DNS Zone File (Advanced Users) link. Click on the link to open your DNS Zone File manager.
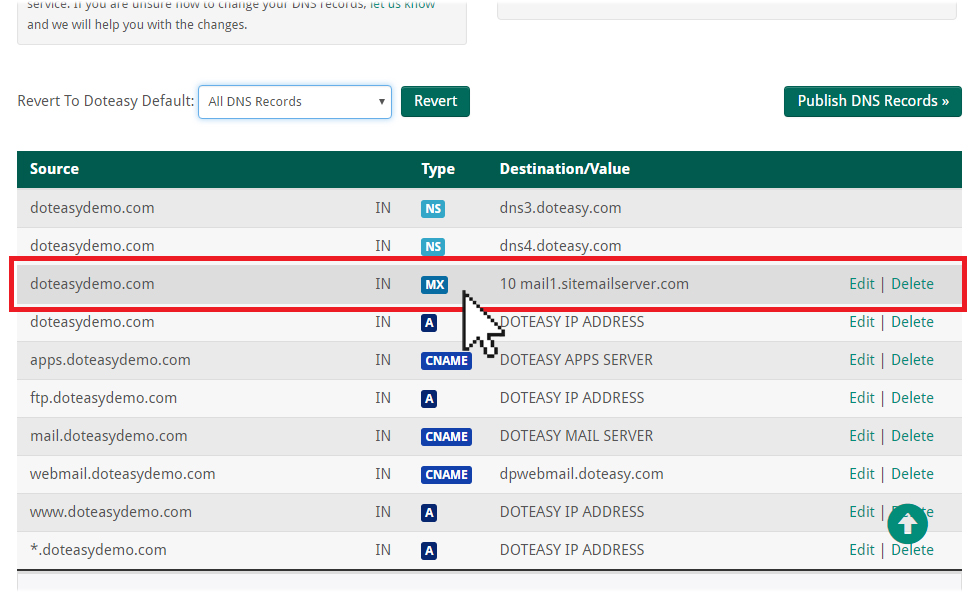
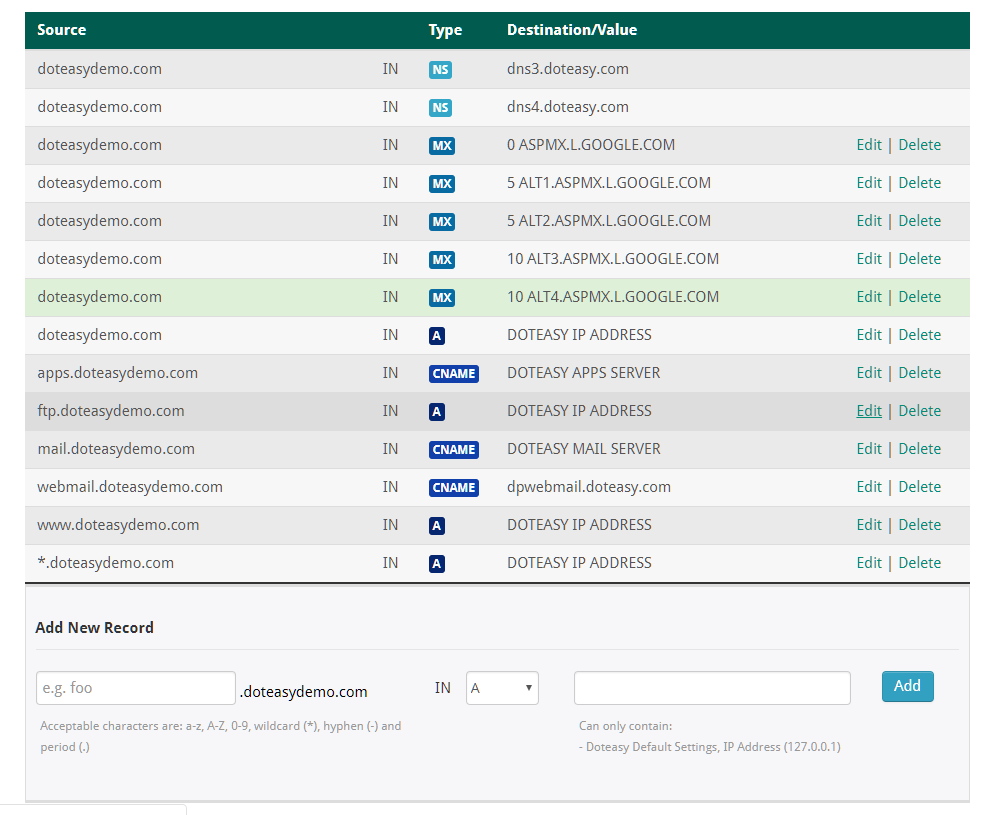
- Scroll down on the Edit DNS Zone File page to find your current MX records.


I need to change my domain MX records. Where can I find my new MX records information?
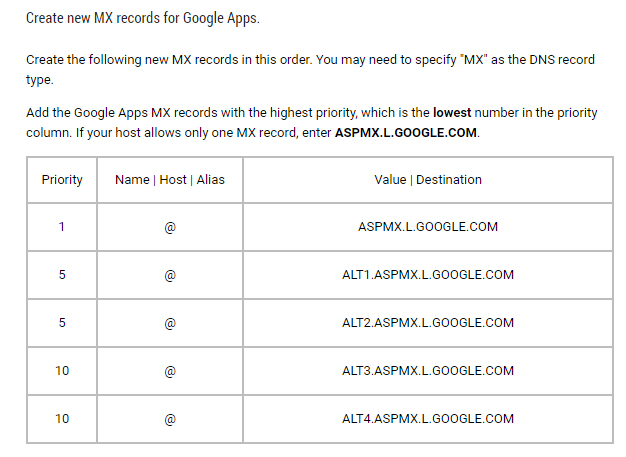
The first step in making any MX records changes is to obtain the new MX settings from your new service provider. For example, if you are using Google Apps/Gmail for your domain emails, then you will need to obtain your new MX records from Google.
*Note, in order for you to use Google Apps MX records, you will need to have a Google Apps account.
Here’s an example of the MX records you would need to use to set up your domain email accounts on Google Apps.
If you are setting up your domain email accounts on Microsoft Office 365, then you will need to use the MX settings provided during the Office 365 setup process .
Because any changes made to your domain MX records will affect your email services, please verify that you have the correct MX record settings before making any changes. Changes typically take 12-24 hours to take effect (or 24-48 hours to fully propagate worldwide), that includes any accidental or incorrect changes as well as any necessary changes to revert your MX records back to Doteasy.
Help! My domain is not registered through Doteasy
You will only be able to make domain MX records changes if your domain is registered through Doteasy, and your domain needs to be in the Active state – in other words, you will not be able to make MX records in your Doteasy Member Zone if your domain has already expired, or if your domain is registered with another registrar.
If you are not sure where your domain is registered, you can use the View WHOIS Record function in your Doteasy Member Zone.
If your domain name was registered with Doteasy, then you will see In2Net Network, Inc. listed as the Registrar, like this example:

If your domain is not registered with Doteasy, then you will need to go to your current domain registrar and make your MX record changes there.
Changing your domain’s MX Record
In this example, we will use the same Google Apps records as above.
- The first step is to log into your Doteasy Member Zone and click on the Edit DNS Zone File (Advanced Users) link to open your DNS Zone File manager.
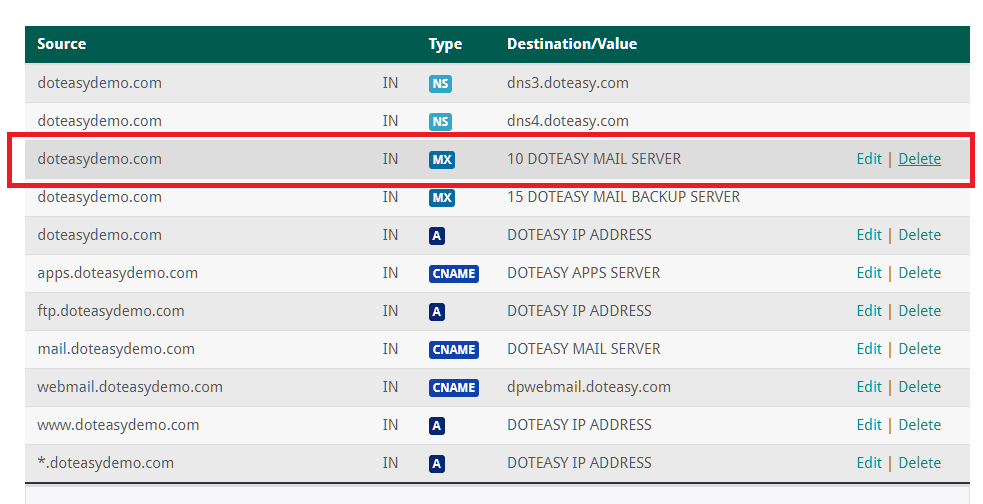
- Once you are on the Edit DNS Zone File page, scroll to the domain records table.
Remove the existing Doteasy MX record by hitting "Delete". Once you delete the Doteasy MX record, the backup server entry will also be deleted.
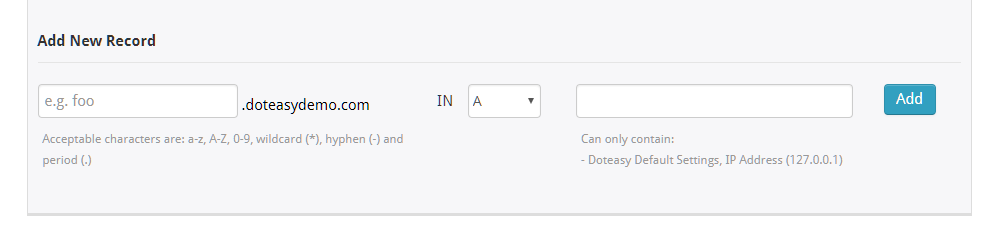
- Next, scroll down to the bottom of the domain records table for the Add New Record section.
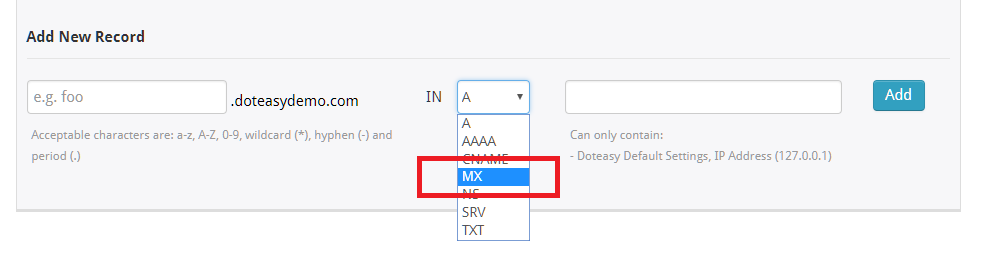
- Select MX from the drop-down menu.
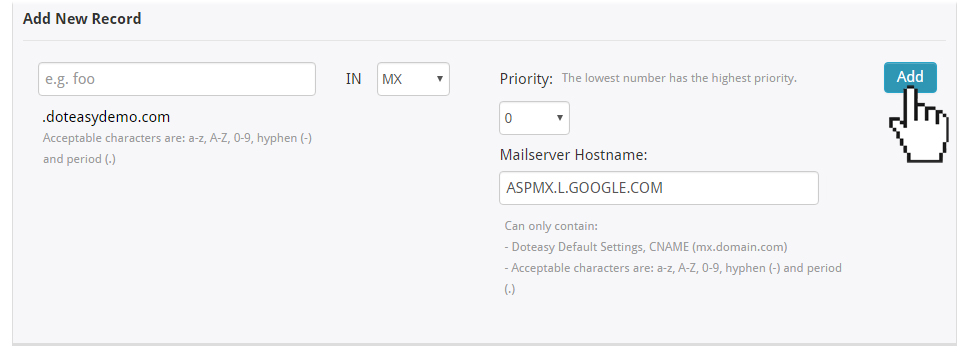
- Enter the Value|Destination setting as provided by Google Apps. When ready, click Add.
- Repeat Steps 4 and 5 for the rest of the settings as per provided by Google Apps.
- After you have added your new MX records to the domain records table, verify that all settings are correct.
- Once you have confirmed that all changes are correct, click on Publish DNS Records on the bottom of the page.
Full propagation typically takes 24-48 hours to complete.
This completes our article on how to make MX records for your Doteasy domain name. If you have any questions or if you need further assistance, you can contact us via Live Chat, email or even phone support.
