Accessing your domain emails using Mozilla Thunderbird
Mozilla Thunderbird is a free email client developed by Mozilla. Thunderbird is available on both Windows and Mac. Like other email clients, Thunderbird allows you to easily check your emails without using a web-based interface (ie. webmail).
In this article, we will show you how to configure the Mozilla Thunderbird application on your computer to access your Doteasy.com domain emails.
Getting started
Pre-checklist:
![]() Create your domain email address
Create your domain email address
![]() Obtain your email client configuration settings from Member Zone
Obtain your email client configuration settings from Member Zone
![]() Install Thunderbird on your computer
Install Thunderbird on your computer
Your email client configuration info
In order to successfully setup your domain email accounts on your Thunderbird email client, you will need to have the following information:
- Domain email address and password
- Incoming mail server and port information
- Outgoing mail server and port information
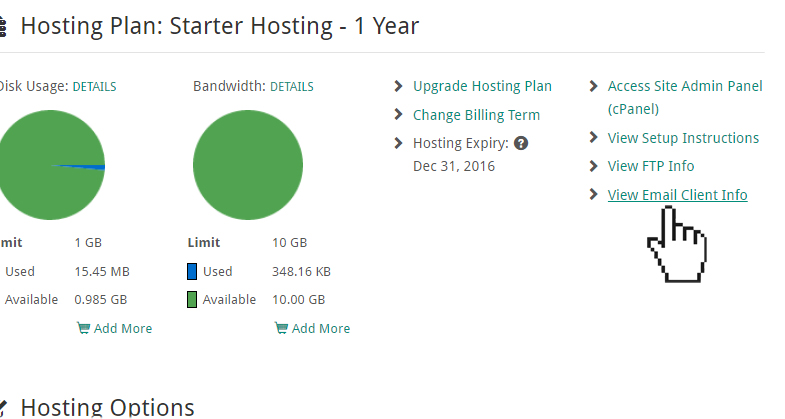
You can find all these information in your Doteasy Member Zone, under View Email Client Info.
For more information on your email client configuration info, please refer to our article Your Email Client Configuration Info.
Installing Thunderbird on your computer
If you don’t already have Thunderbird installed on your computer, you can download the email client from Mozilla’s website.
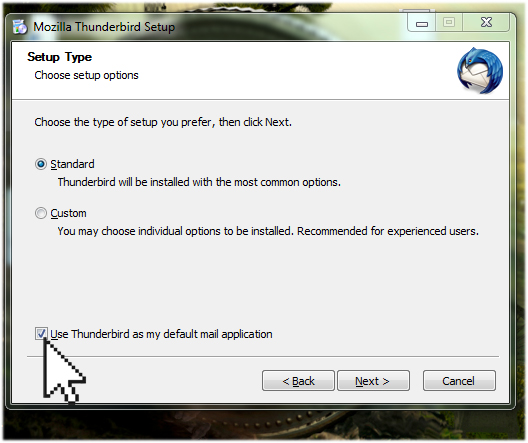
Once you have downloaded Thunderbird on your computer, it is ready for install. During the installation process you will be alerted that it is not your default email application. The default email application is the program that opens, for example, when you click an email link on a website. If you want Thunderbird to be your computer’s default email application, check the Use Thunderbird as my default mail application option.
Adding your domain email account to your Thunderbird
- Open the Thunderbird application. If this is the first time you are opening Thunderbird, it will ask you if you want to use Thunderbird as the default client for your emails, newsgroups, etc. If you want to haven’t yet set it as your default client, you can do so by clicking the Set as Default button. If not, simply click on the Skip Integration button.

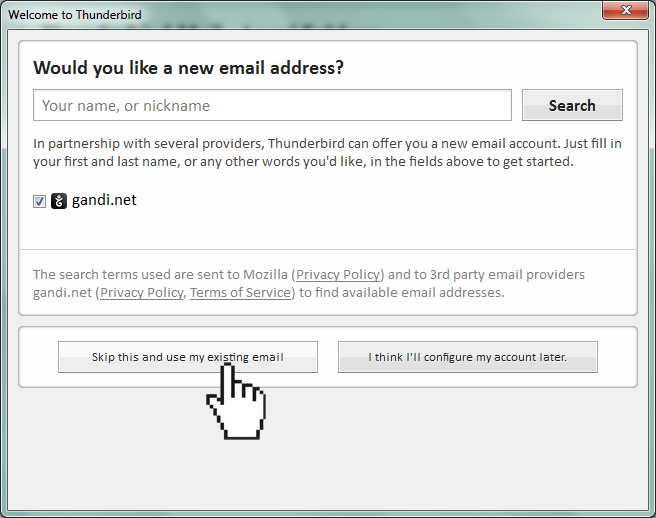
- On the next screen, you will be asked if you would like to sign up for a new email address. Since you are setting up Thunderbird to access your domain email account, click on the Skip this and use my existing email button.
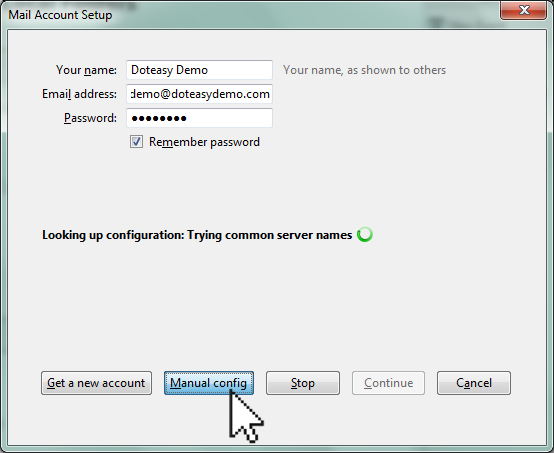
- Next, enter in your name, email address and password. When ready, click Continue.
- At this point, Thunderbird will try to determine your account settings based on the domain portion of your email address (ie. your domain name). While this automatic configuration feature saves you time, very often the information that is auto-retrieved is incorrect and/or the auto-retrieval process takes too long and times itself out, causing more confusion. So you would actually want to enter in your account details manually.
Stop the auto-configuration process by clicking on the Manual config button.
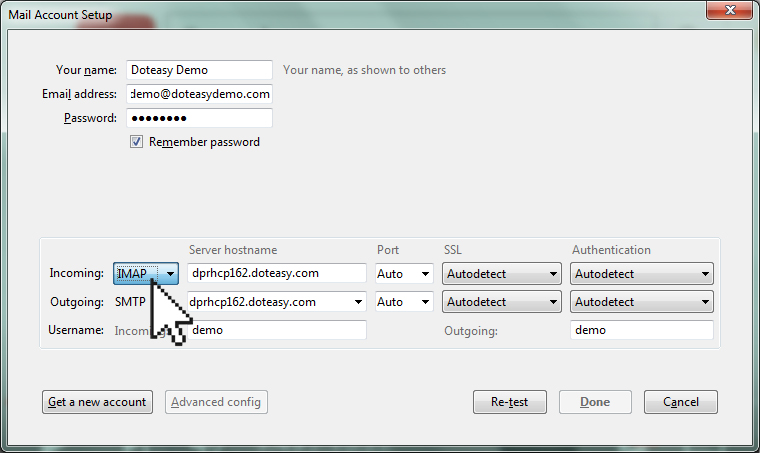
- On the Mail Account Setup window, select the desired incoming protocol from the Incoming drop-down menu: POP3 or IMAP.
*NOTE: If you are currently on the Smartermail platform, the only available option is POP3. If you are on the cPanel email platform, then you can choose between POP3 or IMAP. If you are not sure which one to pick, you can refer to our article POP3 and IMAP
If you are on the SmarterMail platform and want to use IMAP, contact us and we will gladly help you switch over to the cPanel email platform.
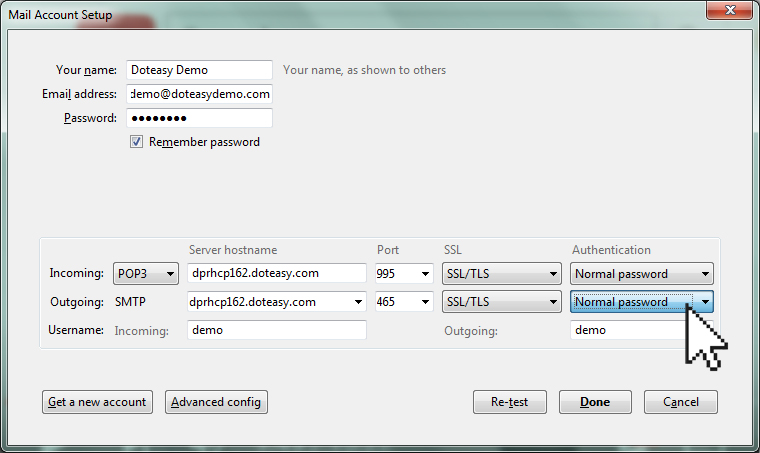
- Enter the incoming mailserver port and SSL options as per your Email Client Info. From the Authentication drop-down menu, select Normal Password.
Port numbers:
- 995 - if you are using the POP3 protocol with Secure-SSL
- 993 – if you are using the IMAP protocol with Secure-SSL
- 110 – if you are using the POP3 protocol with Non-SSL
- 143 – if you are using the IMAP protocol with Non-SSL
- Enter the outgoing mailserver name, port and SSL as per your Email Client Info. From the Authentication drop-down menu, select Normal Password.
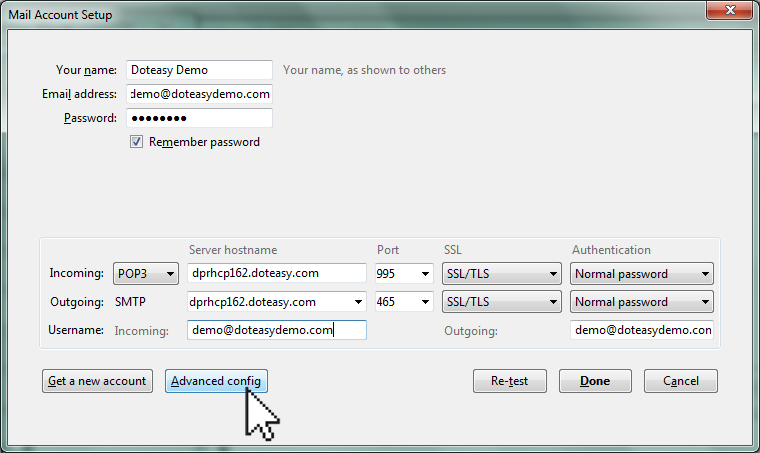
- Enter your username in the Incoming and Outgoing fields. Your email username is your full email address.
Port numbers:
- 465 - if you are using SMTP with Secure-SSL
- 587 – if you are using SMTP with Non-SSL
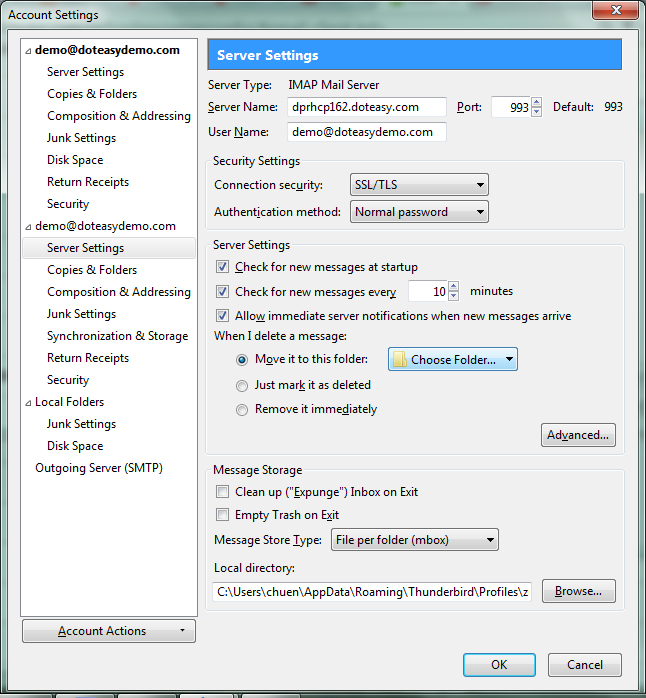
- Next, click on the Advanced config button to open the Account Settings window.
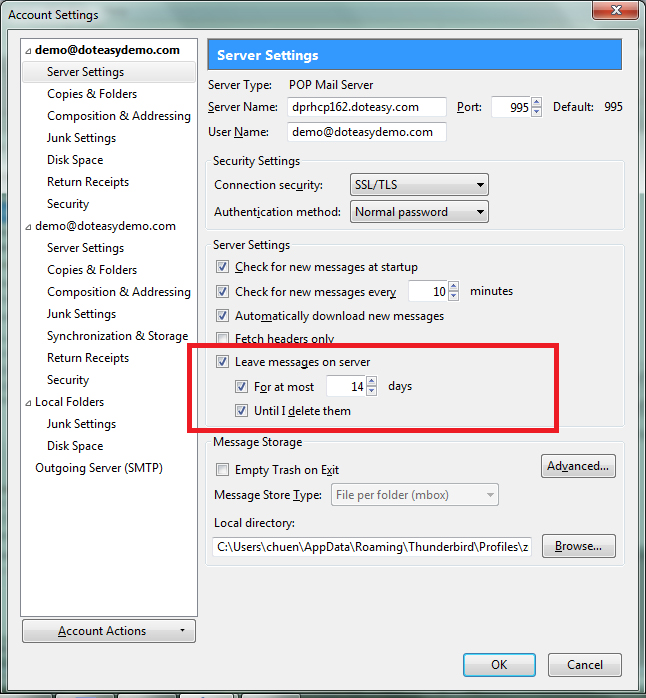
- If you have selected the POP3 protocol, you will see the Leave messages on server option under Server Settings.
This option allows you to specify what happens to your email once it’s been downloaded to your Thunderbird. Check the option and a copy of the email on the mailserver; uncheck the option and the email will be removed from the mailserver once it has been downloaded to your Thunderbird. You can further customize the option by specifying the number of days the email will remain on the server upon download, after which the email will be removed from the server to conserve email storage space.
If you have chosen the IMAP protocol, you will not see this Leave messages on server option. Instead, you will see this:
- When ready, click OK.
Your Thunderbird setup is now completed and you can use it to access your Doteasy domain email account. If you want to use Thunderbird to access another domain email account, simple click on Tools and select Account Settings.
Then, select Add Mail Account from the Account Actions menu.
This will open up the Mail Account Setup panel and you can simply follow steps 3 to 11 for the new domain email account you want to add to your Thunderbird client.


Viewing your emails using Thunderbird
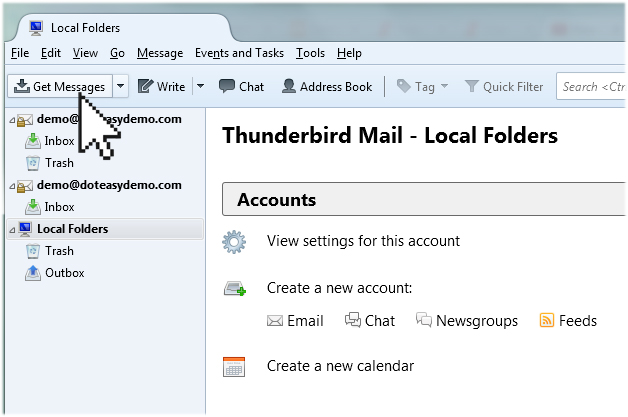
Thunderbird automatically checks your email account(s) periodically for new emails. To manually check for emails, click the Get Messages button.
This completes the Thunderbird configuration process. If you have any questions about this article or our video tutorial, or if you should run into any problems, please do not hesitate to contact us. You can reach us by email, phone and live chat. We also offer a call back service.
