Accessing your domain emails on an iPhone
Mail is one of the core apps on your iPhone.
If you use an email provider like iCloud or Google, Mail can automatically setup your email account with just your email address and password. You can also use Mail to access other email accounts, such as your custom domain email account.
In this article, we will show you how to set up your iPhone with your domain email accounts using the IMAP protocol.
Getting started
Pre-checklist:
![]() Create your domain email address
Create your domain email address
![]() Obtain your email client configuration settings from Member Zone
Obtain your email client configuration settings from Member Zone
Why IMAP protocol?
The POP3 and IMAP protocols determine how your incoming email is moved, saved, deleted and synchronized between the mail server and your inbox. In simple terms, POP3 focuses on the email messages in the inbox on your local device(s), while IMAP focuses on making sure the email messages on the mail server and your inbox(es) are all synchronized. To learn more about POP3 and IMAP protocols, you can refer to our article POP3 vs. IMAP.
Chances are, your iPhone is not the only email-capable device you own. Many people use their iPhone to access emails when they are not around a laptop or computer. If you are using your iPhone as well as other devices to check and manage your domain emails, IMAP is the preferred protocol. IMAP lets you manage your domain email inbox from different locations, using different devices. In other words, with IMAP, you can log in from home, work, iPhone, iPad or desktop and see the exact same view of your email inbox.
Your email client configuration info
In order to successfully setup your domain email accounts on your iPhone Mail app, you will need to have the following information:
- Domain email address and password
- Incoming mail server and port information
- Outgoing mail server and port information
You can find all these information in your Doteasy Member Zone, under View Email Client Info.

For more information on your email client configuration info, please refer to our article Your Email Client Configuration Info.
Setting up email on your iPhone
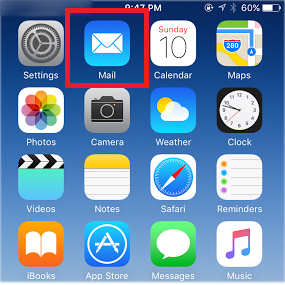
- Open the Mail app.

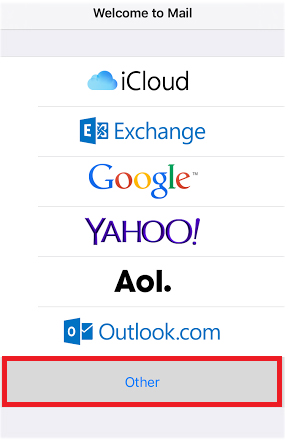
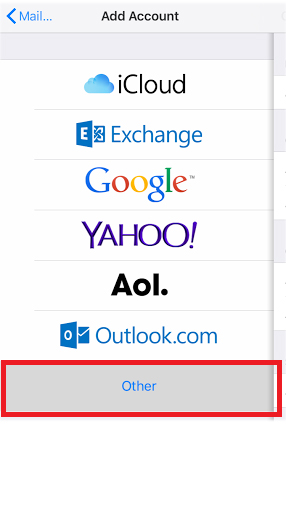
- If this is the first time you’ve set up your Mail app, you will be presented with the Welcome to Mail screen and a list of common types of email accounts. Select Other.
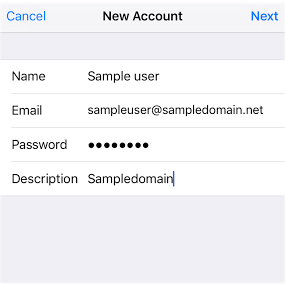
- On the New Account screen, enter the following information:
- Your name – this is the name your email recipients will see when you email them
- Email address – enter your full domain email address, for example, you@yourdomain.com
- Password – enter your domain email account password
When ready, tap Next.
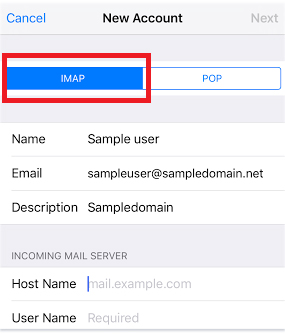
- On the next screen, make sure the IMAP protocol is selected.
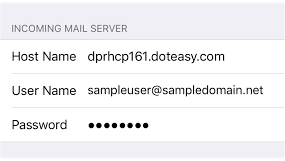
- Under Incoming Mail Server, enter the incoming mailserver name as per your Email Client Info. Enter your User Name and Password. Your user name is simply your full email address.
- Under Outgoing Mail Server, enter the outgoing mailserver name as per your Email Client Info. Enter your User Name and Password. Your user name is simply your full email address. When ready, tap Next.
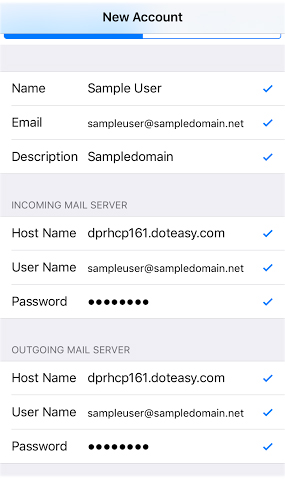
- The iPhone will check your email account information to ensure you have entered the correct email address and/or password. If so, you will see checkmarks next to each item and you will be taken to the next screen.
- On the IMAP screen, move the sliders to On if you want to sync additional items (such as Notes). Once ready, tap the Save button.
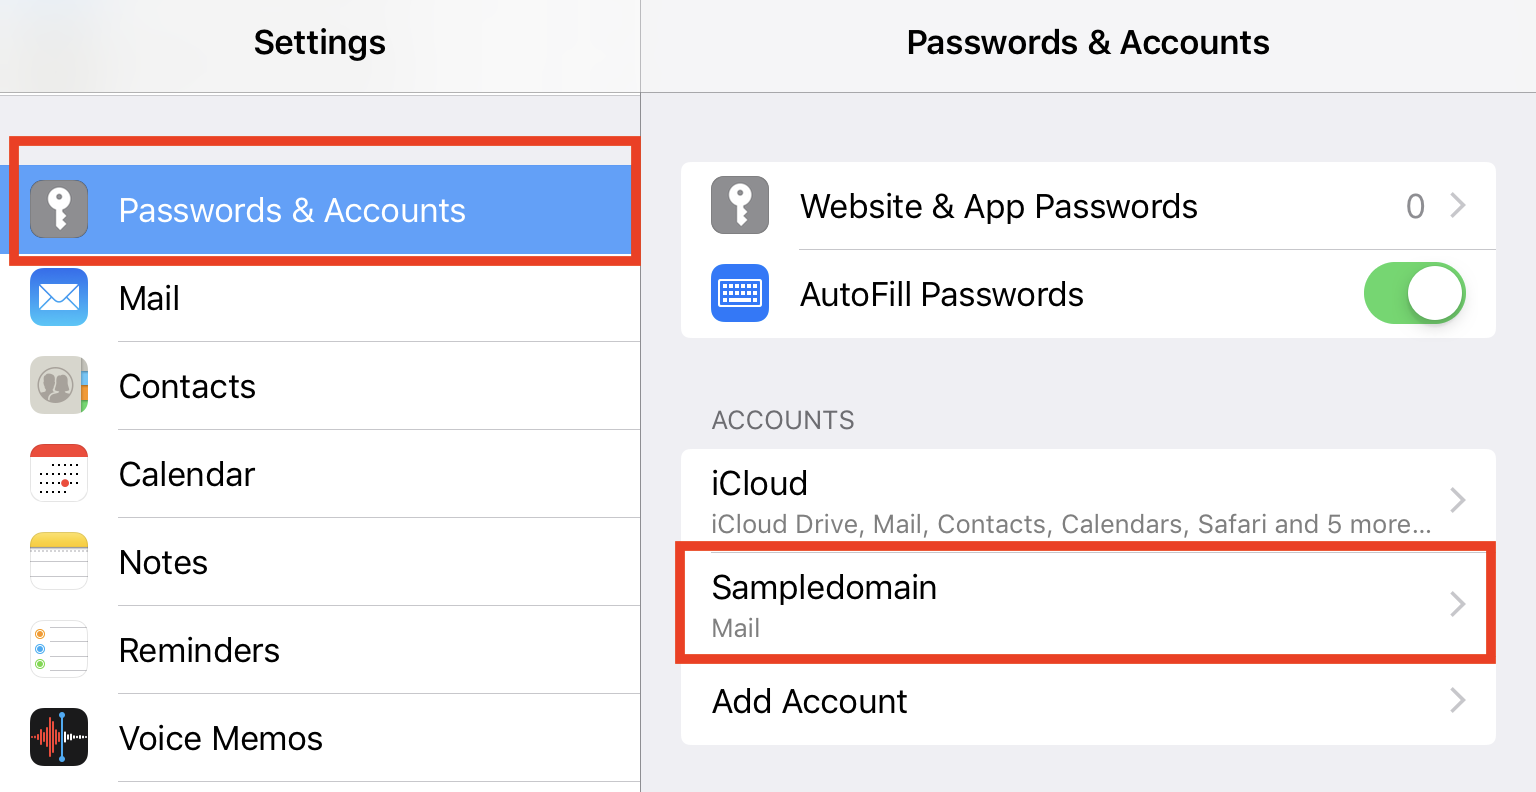
- Once your domain email account has been added to your iPhone, it will be listed under Passwords & Accounts in your iPhone’s Settings tool.
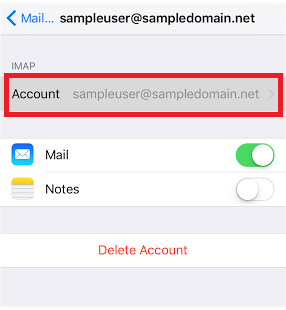
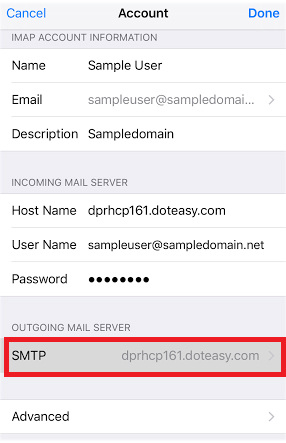
- Now that your domain email account is added to your iPhone’s Mail app, you can proceed to configure your SMTP settings and your folders since we are using IMAP. Select your newly added domain email account and tap on Account to open the Account settings screen.
- Tap on SMTP.
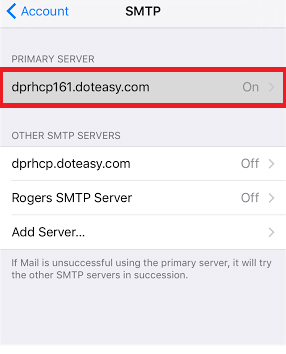
- On the SMTP screen, tap on your Doteasy mailserver under Primary Server.
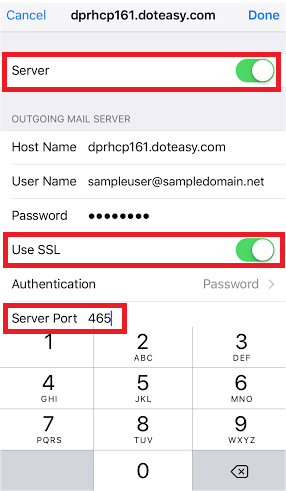
- Make sure the server is enabled. If you have enabled Use SSL, make sure you have the correct port number, 465. When ready, tap Done.
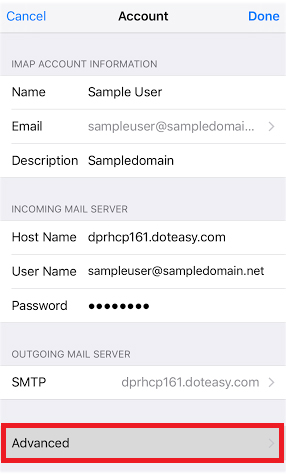
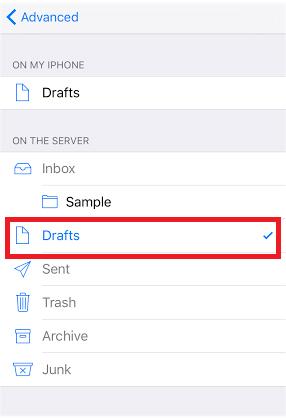
- Going back to the Account settings screen, tap on Advanced.
- On the Advanced settings screen, tap on Drafts Mailbox. This will open the Drafts screen. From the On the server section, make sure Drafts is selected.
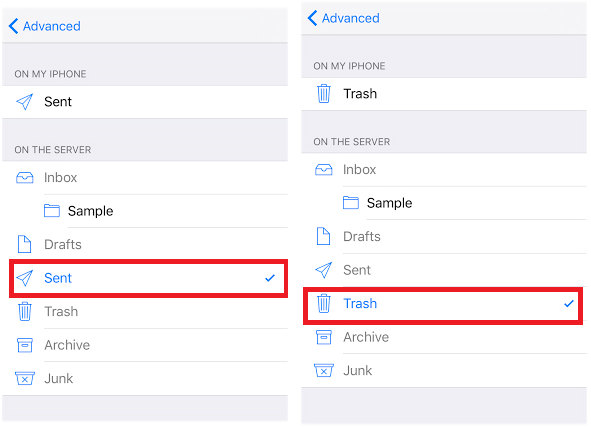
- Repeat the same for the Sent, and Trash mailbox settings.
- When ready, tap Done and your domain email account is now configured on your iPhone.


Adding domain email accounts to iPhone via Settings
You can also add your domain email account to your iPhone via Settings on your Home screen.
![]()
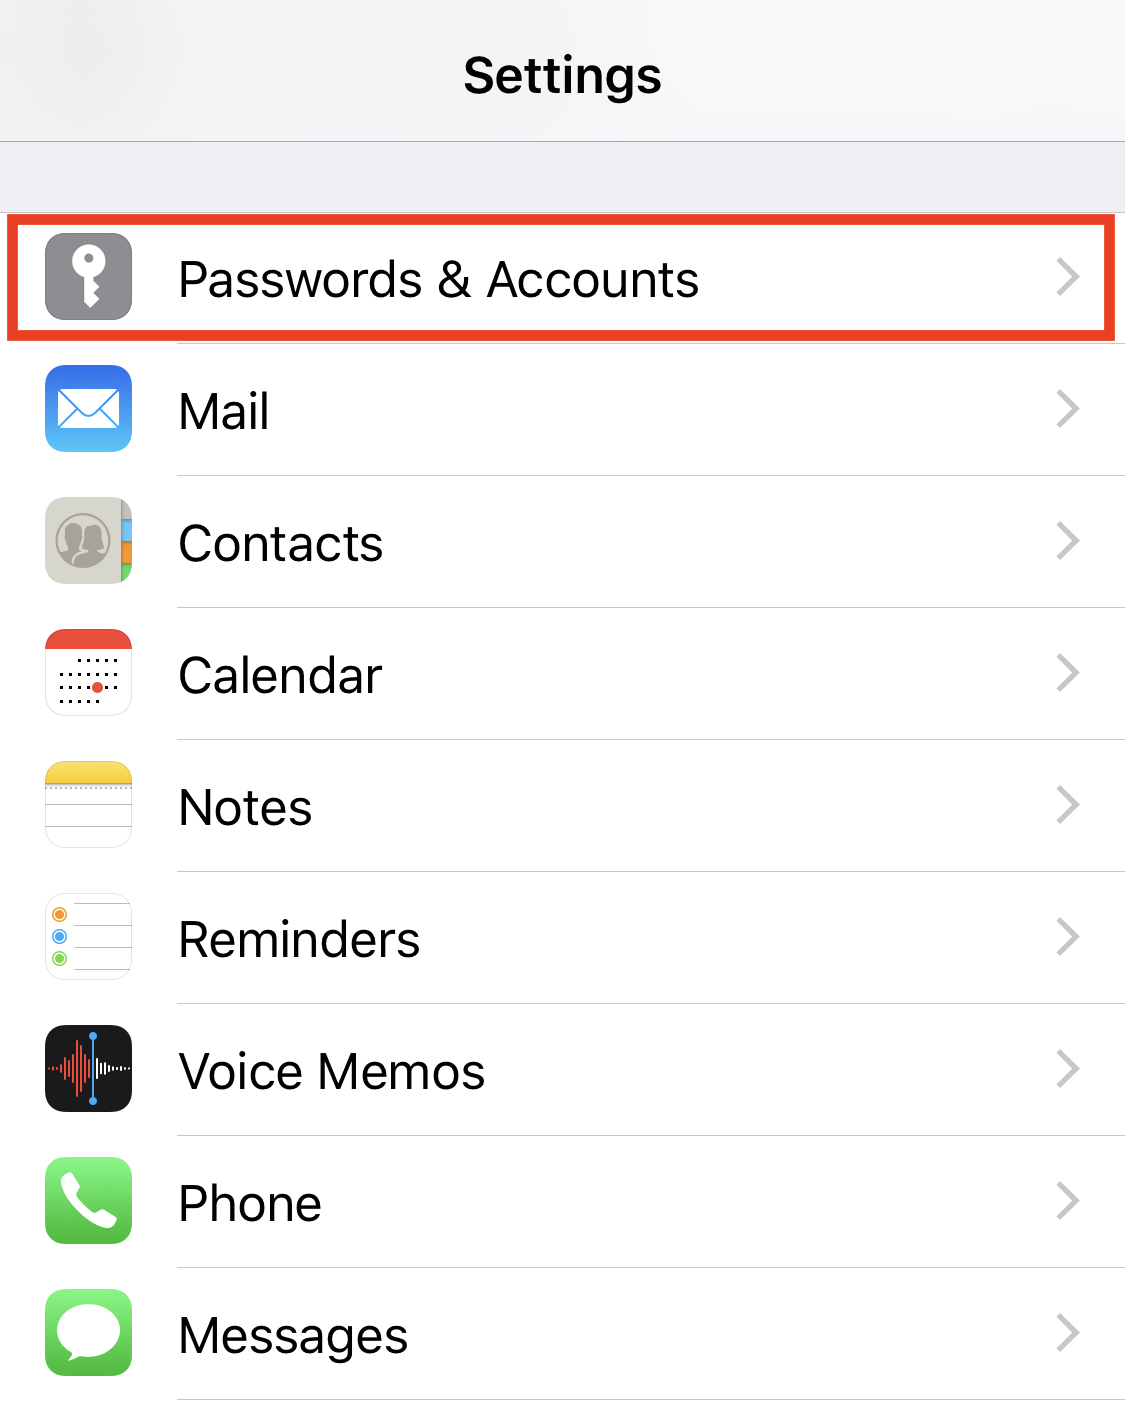
- Tap on Settings on your Home screen to open the Settings screen.
- On the Settings screen, tap Passwords & Accounts.
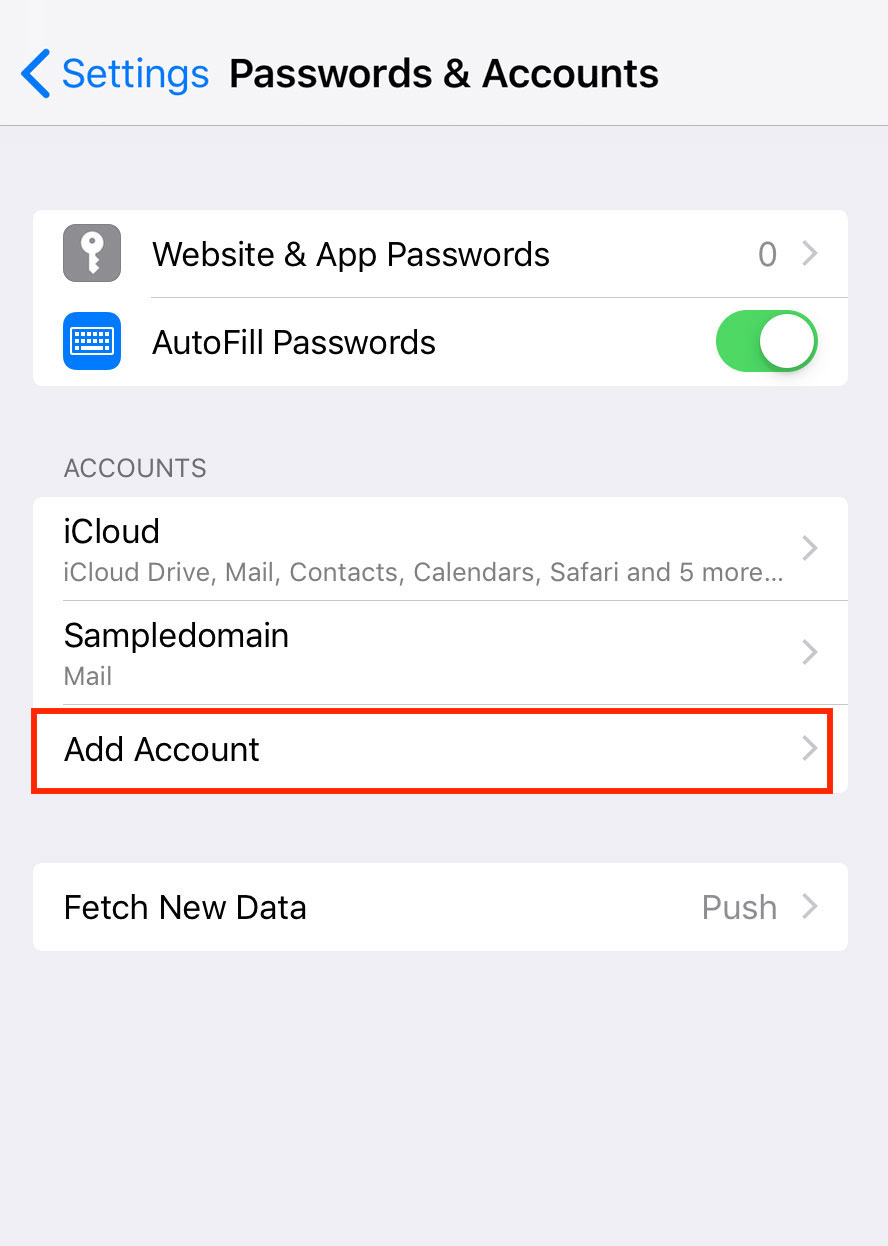
- On the Passwords & Accounts screen, tap Add Account.
- This will take you to the Add Account screen. Tap Other.
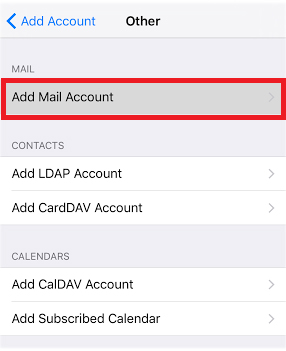
- On the Other screen, tap Add Mail Account.
- From there, follow the process for adding a new account detailed above (Steps 3 to 17).
Your iPhone is now configured to access your Doteasy domain email account using the iOS Mail app.
This completes the iPhone Mail configuration process. If you have any questions about this article or our video tutorial, or if you should run into any problems, please do not hesitate to contact us. You can reach us by email, phone and live chat. We also offer a call back service.
